Muleでメール送信のWEBサービスを起動してみる
昨日のMuleの続きです。
既存のJava資産があれば、Muleを使用することでHappyになれるらしい?ので、メールの送信プログラムというJavaの資産があると仮定して、どれだけの手間でWEBサービスを提供できるか試してみました。まずは、以下のようなメール送信用のインターフェースを定義します。
package jp.co.jsol.basis.sample.mule;

import javax.jws.WebParam;
import javax.jws.WebResult;
import javax.jws.WebService;

@WebService
public interface IMailTransfer {

@WebResult(name="result")
    public String SendMail(
    @WebParam(name="address") String address,
      @WebParam(name="fromAddress") String fromAddress,
      @WebParam(name="fromAddressName") String fromAddressName);
}
次に実装を行います。この実装部分は実際にはJavaの資産を流用します。今回はそのまま実装してしまっていますが。
public class MailTransfer implements IMailTransfer{

    public String SendMail(String address, String fromAddress, String fromAddressName) {
        Properties objPrp = new Properties();
        objPrp.put("mail.smtp.host", "192.168.0.1"); // SMTPサーバ名
        objPrp.put("mail.host", "192.168.0.1"); // 接続するホスト名
        // メールセッションを確立
        Session session = Session.getDefaultInstance(objPrp, null);
        // 送信メッセージを生成
        MimeMessage objMsg = new MimeMessage(session);
        String ret = "NG";
        try {
            // 送信先(TOのほか、CCやBCCも設定可能)
            objMsg.setRecipients(Message.RecipientType.TO,address);
            // Fromヘッダ
            InternetAddress objFrm = new InternetAddress(fromAddress, fromAddressName);
            objMsg.setFrom(objFrm);
            objMsg.setSubject("メールテスト", "ISO-2022-JP"); // 件名
            objMsg.setText("こんにちは", "ISO-2022-JP"); // 本文
            Transport.send(objMsg);//メール送信
            ret = new String("OK");
        } catch (UnsupportedEncodingException e) {
            e.printStackTrace();
        } catch (MessagingException e) {
            e.printStackTrace();
        }
        return ret;
    }
}
最後にMule起動用のXML定義を書きます。ここでは、ファイル名をmail-config.xmlとします。(←適当な名前でOK)
<?xml version="1.0" encoding="UTF-8"?>
<mule xmlns="http://www.mulesource.org/schema/mule/core/2.2"
       xmlns:xsi="http://www.w3.org/2001/XMLSchema-instance"
       xmlns:spring="http://www.springframework.org/schema/beans"
       xmlns:soap="http://www.mulesource.org/schema/mule/soap/2.2"
       xmlns:axis="http://www.mulesource.org/schema/mule/axis/2.2"
       xmlns:vm="http://www.mulesource.org/schema/mule/vm/2.2"
    xsi:schemaLocation="
       http://www.springframework.org/schema/beans http://www.springframework.org/schema/beans/spring-beans-2.5.xsd
       http://www.mulesource.org/schema/mule/core/2.2 http://www.mulesource.org/schema/mule/core/2.2/mule.xsd
       http://www.mulesource.org/schema/mule/soap/2.2 http://www.mulesource.org/schema/mule/soap/2.2/mule-soap.xsd
       http://www.mulesource.org/schema/mule/axis/2.2 http://www.mulesource.org/schema/mule/axis/2.2/mule-axis.xsd
       http://www.mulesource.org/schema/mule/vm/2.2 http://www.mulesource.org/schema/mule/vm/2.2/mule-vm.xsd">

    <model name="mailSample">
        <service name="MailUMO">
            <inbound>
                <axis:inbound-endpoint address="http://localhost:65081/services">
                    <soap:http-to-soap-request-transformer/>
                </axis:inbound-endpoint>
            </inbound>

            <component class="jp.co.jsol.basis.sample.mule.MailTransfer">
                <method-entry-point-resolver>
                    <include-entry-point method="SendMail" />
                </method-entry-point-resolver>
            </component>

        </service>
    </model>
</mule>
コマンドプロンプトから以下のように打ち込みます。
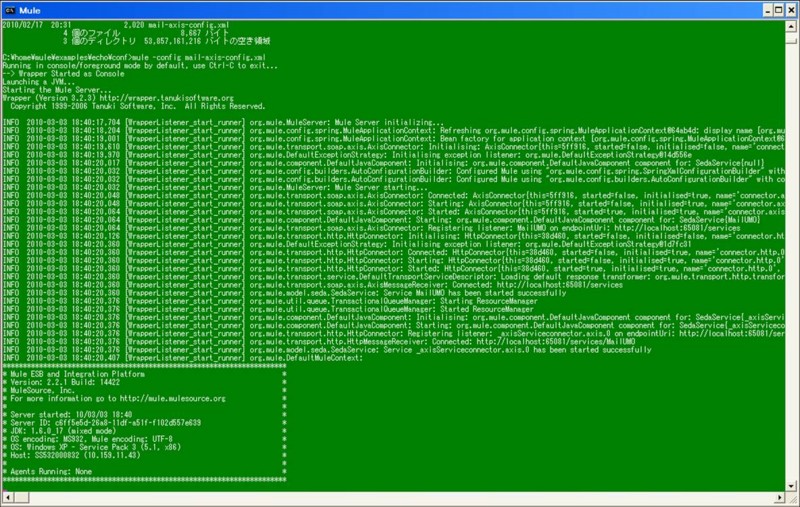
すると以下のようにMuleが起動します。
C:\> mule -config mail-config.xml

試しにWebブラウザで、XML定義で指定したURL+サービス名+?wsdl(http://localhost:65081/services/MailUMO?wsdl)にアクセスしてみると、以下のようにWSDLが取得できます。
